What is dot painting?

Dot painting is entertaining, artistic, and beautiful. It is a fantastic technique for both amateur and experienced painters as it can be made simple or complex. The art of creating dot painted mandalas is very popular and enjoyable. They also make wonderful decorations, gifts, and can be sold.
In this tutorial I will show you how to create professional looking dot paintings with minimal practice. And hopefully you will learn how to make the best dot painting you can, and enjoy this blog. This will give you insight to the process of dot painting.
The Supplies you need to start Dot Painting
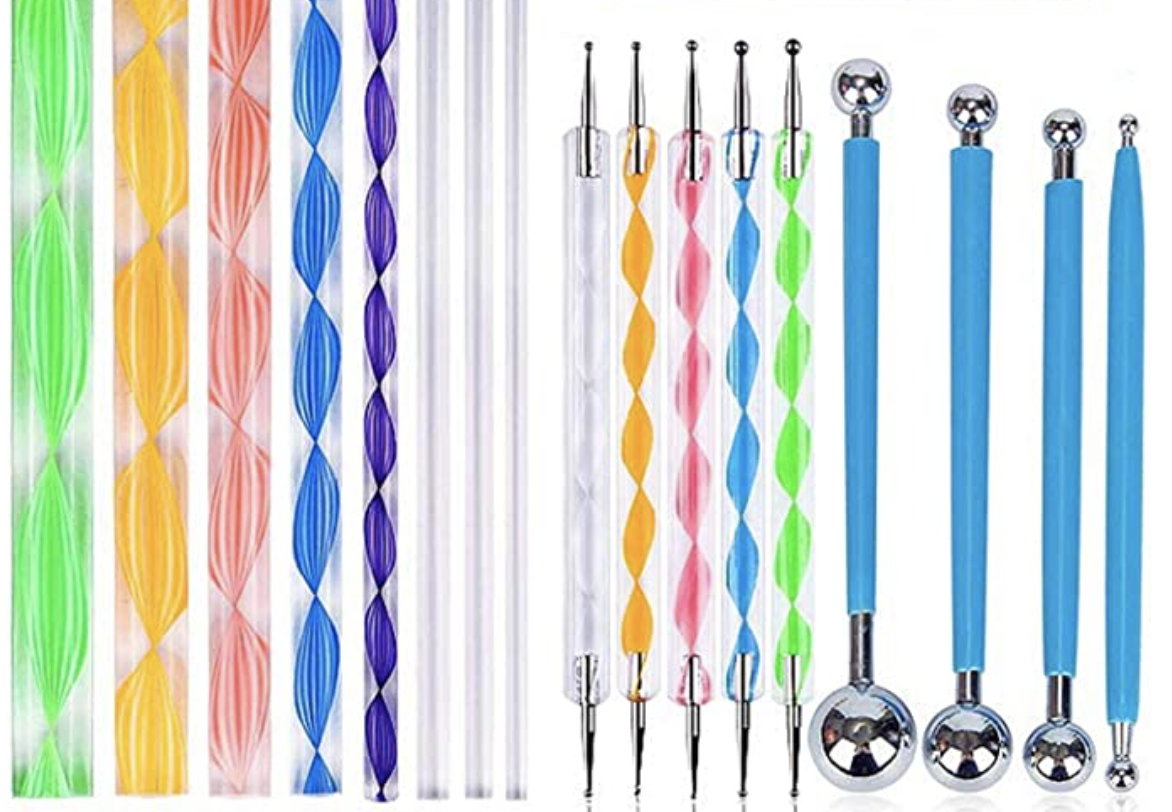
The tools used for dot painting are quite simple and can be bought on Amazon or on my website ButterStyle. Amazon/dot.painting/mandala ButterStyle/dot.painting. In fact you can make them yourself! DIY dotting tools are not as good or long lasting but are a good way to try dot painting.
You will also need the item you will be painting on (rock, paper, etc.) You can also use a stencil to create your pattern. The type of paint you use depends on the look you are going for and what you have on hand. I use acrylic but there are so many types you can try!
You’ll need something to put your paint on so you can dip your tools in the paint. A paper plate is a low cost option. There are also paint pallets and mini containers for individual colors. You will also need paper towels as well to wipe your tools on.
Follow these links to make your own dotting tools: Make your own dotting tool with household materials! Handmade Dotting Tools | Dot Mandala | Nail Art Tools | DIY || ABC
How to use Dotting Tools

The art of dotting is fairly easy to grasp. All you have to do is dip your dotting tool in a small amount of paint then dot your tool where you want the dot of paint to go. You don’t have to press hard and there is no need for dragging your tool in the paint or on your mandala.
You do have to make sure you wipe off your tools on a paper towel fairly often, so the paint doesn’t dry on your tool. If paint dries on your tool it can ruin your tool and dis-shape your dots. It’s best to hold your dotting tool on a slight angle, like a pencil.
Step 1: The Center and Surface

To start a mandala you first need to pick out what you will be painting on.
You can paint on paper, vases, wood, ornaments, rocks, or anything you can think of. If you are new to this type of painting it is best to use cardstock paper. If you are painting on rocks make sure it is free of dirt and is fairly smooth.
Once you have decided what you will be painting on you need to find the center. Using a tape measure or ruler, find the very center of where you want your mandala to be and draw a dot in pencil where the center is.
Step 2: The Pattern

Next is finding your pattern. A simple google search for ”dot painting stencils” can help you get an idea for what type of mandala you would like to create. Don’t be too ambitious if you are new to dot painting.
Once you have a pattern picked out or one of your own created trace/draw it on your surface in pencil. Make sure you draw lightly so it doesn’t ruin your suffice or end result. If you don’t want to use a pattern and just free style it all you need is a center mark and possibly some circles going out from your center with lines to the center to help you keep things symmetrical. Find examples of this here.
Step 3: First Dot and Colors

Now that you have your center and pattern you need to pick out the colors you will be using. I find its best use at least 3 colors and no more than 10. Try to pick colors that compliment each other using a theme. You can find inspiration for your colors from anywhere, such as online, past artwork, clothes you like, nature, or anything you see.
Once you have your colors take the size dotting tool you want for your first dot and place your dot. You can also start from the outside of your mandala and work your way in.
Step 4: Expanding your Mandala:
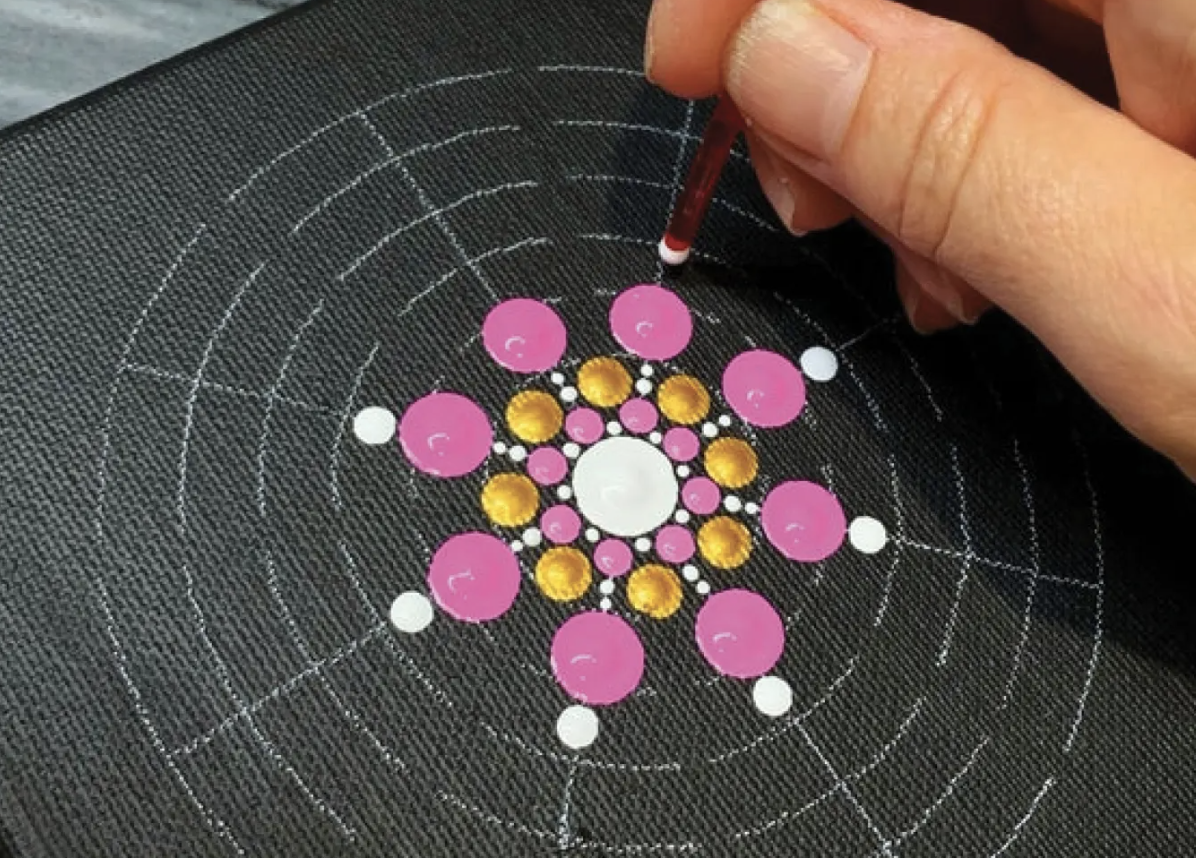
The easiest process for adding on to your mandala is to build out from your center dot with the biggest dots in your pattern then once the big dots are dry going back and adding the smaller dots. Or you can build outward from the middle not caring about the order of the sizes.
Once the dots are dry you can go back and put smaller dots on the original dots in a different color. You can also go back and add more small dots around the larger ones until it is as filled in as you want your mandala.
Step 5: Being Patient

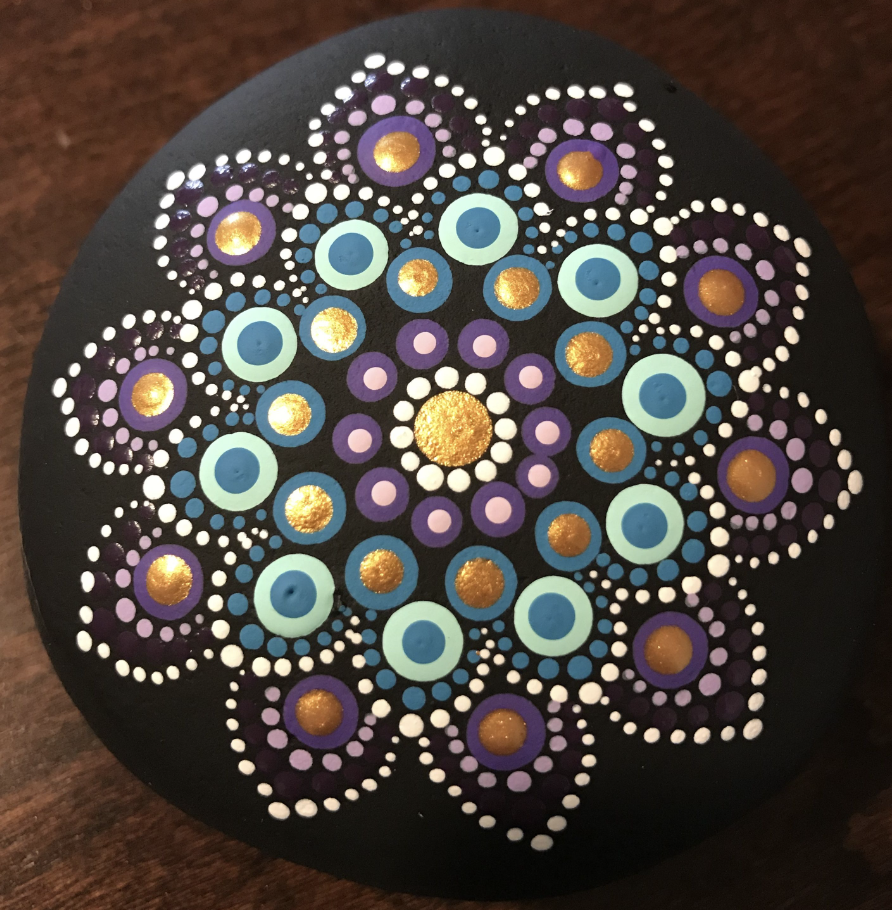
As with all types of painting it is important to stay patient, and many dot painted mandalas can be very elaborate.
If you are not patient you risk having a sloppy looking end result or your mandala not being exactly as you had imagined or wanted it. You do not want to put in all that effort for it to not look appealing. Make sure that if you are going close to, or on top of, what you have already painted to wait for it to fully dry.
With dot painting, it is easy to take a break as most of the tools do not require washing or rinsing, but instead just need to be wiped off on a paper towel throughout use. All you need to do is make sure your paint won’t dry out. You can cover your pallet with cling wrap for short periods of time or use small containers that you keep your paint in instead of a pallet.
If you are having a hard time being patient you should take a break and sit back for a minute then come back to your art. You can also try eating some food or getting a snack to eat while you are painting. Another way to keep yourself calm is by listening to some music. (I find classical the best for painting but using your favorite songs is good too!)
Step 6: Finishing your Mandala
Now that you have completed your dot painting and it is fully dry, you should very gently use an eraser to erase any showing pencil lines. Do not rub the eraser against the painting too harshly as it might damage your mandala.
This is the time to go back and fix any mistakes that you may have made. You can do this by covering up any misplaced dots with the background color, then after that fully dries placing a new dot in the correct place. Just be careful not to mess it up further.
If you are worried about the paint coming off, you can cover it in modge podge, or use a protective spray coating over your mandala.
Don’t forget to sign it!
What to do with your finished Mandala

Yay! You made some beautiful mandala dot art! And hopefully you had fun doing it. You can now hang your mandala painting up or set it on a shelf. Dot paintings also make great gifts, especially if you are looking for a handmade gift item. Dot painted mandalas can also be sold to other art lovers.
If your mandala did not come out exactly as you wanted and imagined, that’s ok. Sometimes it takes a few tries to get used to a new style of painting, and learning what works best for you. Give it another try, your next one will most likely turn out much better.
And if you are pleased with how your mandala ended up, congratulations! You should still make more as it’s fun, and you get to grow your skills.
Thank you for reading!
For more tutorials from me, subscribe to my blog.To get the best art supplies, go to my website, ButterStyle